Friday, April 30, 2010

Our Craft Lounge RELEASE!


It's release day at Our Craft Lounge and I have a stamp set to give away!  The set I have to show you today is called Tweet Thang.  Isn't it adorable?  Well, you could win it just by leaving a comment on this post by Sunday, May 2nd at 3pm Eastern!  Here are the details about winning the blog candy:

1) you MUST be signed in to Blogger or leave contact information in order to be entered
2) you can enter on each blog once each day and
3) you will only be eligible to win one new set.
 
Blog candy will be drawn on each blog Sunday, May 2nd at 3pm Eastern.  Winners will be notified by the designer & a full list of winners will be posted on the OCL Blog.
 
I used the OCL Design Team Sketch for my card today.  I colored the image using Copic markers.  For more new set samples and more chances to win a set, please visit these blogs and leave a comment!

Amber HIllman
Broni Holcombe
Cambria Turnbow
Chelle Fowler
Cindy Lawrence
Deb Felts
Deborah Anton
Denise Marzec
Heather McNally
Holly McMillen
Jeanne Streiff
Kendra Wietstock
Kisa Peters
Pam Hooten
Terri Thill
Vicki Garrett

Thanks for stopping by and good luck!

Thursday, April 29, 2010

OCL Sneak Peek - Kona


It's day two of sneak peeks for the new sets coming to Our Craft Lounge!  Today I have Kona to show you!  Isn't he adorable?  I just LOVE Kona!  I used Copic markers to color the image and one of my favorite paper collections, Snorkel by Cosmo Cricket.  Don't forget to stop by the Our Craft Lounge Blog to see some of the full sets. 
You can visit these DT member blogs to see more peeks:
Cambria Turnbow
Chelle Fowler
Cindy Lawrence
Deb Felts
Deborah Anton
Denise Marzec
Heather McNally
Holly McMillen
Kendra Wietstock
Kisa Peters
Pam Hooten
Terri Thill
Vicki Garrett

Thanks for stopping by!  Stop back tomorrow to see which set I'm giving away right here!  SUPPLIES USED:  Stamps- Kona (Our Craft Lounge); Paper- Snorkel Collection (Cosmo Cricket); Accessories- Dew Drops (The Robin's Nest), button (Foofala), hemp, Copic markers; Finished card measures 5.5"x4.25"

Wednesday, April 28, 2010

OCL Sneak Peek - Treasured Friend

 It's time for some sneak peeks of the new sets coming out at Our Craft Lounge!  There are 13 new sets for you to see, so be sure and visit the design team blogs to see peeks today through Friday AND leave comments for chances to win! 

The set I have to show you a peek of today is called Treasured Friend.  It is such an absolute sweet set, especially if you love beach themed stamps!  On this card, the box image comes separately from the girls.  You can stamp them in the box or just by themselves.  There are even adorable sentiments that you can stamp in the box!  For my image, I used both girls and I colored the sand and water using Copic markers.  The sun is not actually part of the set. . .I colored it in myself with Copic markers.  You can't really see it too well in the photo, but I used a Cuttlebug embossing folder for the wavy stripes at the bottom along with my Scor-Pal.  The last little touch was the hemp.  You can see some of the full sets on the OCL Blog today and tomorrow!

If you'd like to see more sneak peeks, please visit the following blogs:

Amber Hillman
Beth Silaika
Cambria Turnbow
Chelle Fowler
Cindy Lawrence
Deb Felts
Deborah Anton
Denise Marzec
Heather McNally
Holly McMillen
Kendra Wietstock
Kisa Peters
Pam Hooten
Terri Thill

Thanks for stopping by today!  Be sure and come back tomorrow!  :)  SUPPLIES USED:  Stamps- Treasured Friend (OCL); Paper- Hawaiian Mist (PTI); Accessories- Copic markers, hemp, Cuttlebug, Scor-Pal;  Finished card measures 5.5"x4.25"

Tuesday, April 27, 2010

You Brighten My Day

I really like these Animals in Love A la Carte images from Taylored Expressions.  I really love finding other sentiments to go with them. . .you know, other than the Valentine-themed ones.  For this card, I used the Flamingos in Love stamp along with a sentiment from A Year of Sweet Sentiments.  I colored the image with Copic markers and then added Stardust Stickles all over the "sun".  It so nice, bright and sparkly!  :) 

Thanks for stopping by today!  Hope you're having a wonderful day!  SUPPLIES USED:  Stamps- Flamingos in Love, A Year of Sweet Sentiments (Taylored Expressions); Ink- Tuxedo Black (Tsukineko); Paper- Kitchen Spice Collection (Bo Bunny), Prism Papers;  Accessories- Copic markers, Stardust Stickles, Bits of Bling;  Finished card measures 4.25"x5.5"

Sunday, April 25, 2010

April Papertrey Ink Blog Hop

It's time for the April Papertrey Ink Blog Hop!  This month's theme was tissue paper.  There are many different ways you can use tissue paper on your cards, but I chose to use the Beautiful Blooms II #2 dies to create this tissue paper flower.  I had some brown tissue paper and I cut out the three different sized flowers, attached them all with a rhinestone brad and "fluffed" the petals.  I spritzed them with Pearlized Cream Maya Mist to give them a shimmery look.  So pretty on the dark tissue paper.  I used a sentiment from the Spiral Bouquet set. . . one of my favorites!  The papers are the Pretty Pastels patterned paper, Dark Chocolate and Melon Berry.


If you'd like to see more inspiration using tissue paper, please check out the blog hop thread in the PTI forum!  I know I always enjoy seeing what everyone else created!  Thanks for stopping by! 

Here's To You Hot Stuff


Here's I card I made using this past Friday's Our Craft Lounge Design Team Sketch.  This sketch comes from a beautiful card that my sweet friend Denise made.  I used the Hot Betty set for mine.  At first, I went to color the oven in a gray, but then I was feeling a little Southwestern, so we ended up with these colors.  I used a bit of Garden Variety paper from Cosmo Cricket and my long time favorite, Tangerine Tango! 

Hope you'll play along in the sketch challenge!  They're a lot of fun and you can win a free stamp set!  Speaking of stamp sets, OCL has a new release coming up later this week, so stay tuned!  Thanks for stopping by and have a great day!  SUPPLIES USED:  Stamps- Hot Betty (Our Craft Lounge); Ink- Tuxedo Black (Tsukineko); Paper- Tangerine Tango (SU), Garden Variety (Cosmo Cricket), Prism Papers; Accessories- Copic markers, Bits of Bling, ribbon (May Arts);  Finished card measures 4.25" square

Friday, April 23, 2010

You're So Amazing

Tonight is the night!  Tonight is Verve's Beach Party Release Party starting at 9pm Eastern!  If you've been following the New Release Spotlight on the Verve Blog, you've seen some of the Verve goodness that's going to be available tonight!  If you haven't left comment on the Verve Blog, then you're missing out on chances to win some of that goodness! 

The card I have to share with you is using one of the Beach Party Challenge sketches.  (The Beach Party Challenges are another way to win some Verve!!!)  I used the Happy Days set along with some Cosmo Cricket paper! 

Hope to see you tonight at the release!  Thanks for stopping by!  SUPPLIES USED:  Stamps- Happy Days (Verve Stamps); Ink- Fresh Snow, Hawaiian Shores (PTI); Paper- Snorkel Collection (Cosmo Cricket), Prism Papers; Accessories- Plain and Scallop Circle Nestabilities (Spellbinders), white embossing powder;  Finished card measures 4.25"x5.5"

Thursday, April 22, 2010

Center of Attention Product Spotlight - Thickers


Once a month half of the Baker's Dozen participates in a TE Product Spotlight. It's so fun to showcase products from the TE Store that you might not be aware of or might just like to learn more about.  This month we are featuring Thickers self-adhesive dimensional letters by American Crafts in a variety of styles to add a special pop to all sorts of projects. You will love how easy they are to use. The size makes them great as a focal point or large sentiment on cards. They're also perfect for scrapbook pages of all sizes. The fabric styles can easily be customized with a variety of coloring mediums. Whatever your message, you can say it with Thickers!


For my projects today, I used the 
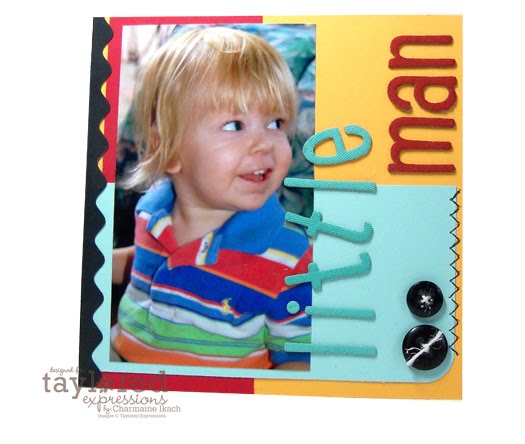
Thickers Patchwork in aqua.  My first project is a scrapbook page.  I LOVE using Thickers for scrapbook pages because you can overlap the Thickers on the picture.  Also, the sentiment doesn't get lost on the page because it's nice and big.  If you notice on the scrapbook page, some of my letters are red.  That the other thing I love about Thickers.  If you don't like the color you have, or it doesn't match your project, you can use a coloring medium to change their color!  I used a Chili Pepper Acrylic paint dauber to change the letters in "man". 


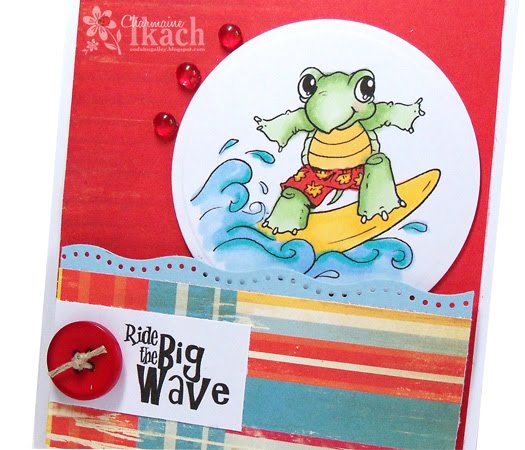
For my second project, I paired the Thickers with one of the A la Carte Animals in Love images, Scotties in Love.  I love how I could change the feel of the stamped image by creating my own sentiment, in this case "Ruff Day?"  Again, the sentiment doesn't get lost because it's nice and big!


Taylored Expressions currently has several styles of Thickers in stock including polka dot chipboard, fabric covered chipboard, glossy finish puffy and glitter puffy in a variety of colors. All Thickers are on sale for 15% OFF through April 25th, so you'll get approximately 125 letters, numbers and symbols at the sale price of ONLY $4.24!

Please visit these members of the Baker's Dozen for more inspiration using this wonderful product:

Karen G.,Jodi, Melissa, Donna and Taylor

Thanks for stopping by today and have a great day!

Verve Blessings


If you haven't been visiting the Verve Blog, the New Release Spotlight has begun!  Head on over to see the new stamps being released tomorrow and get in on a chance to win them!  Today's Spotlight is on the set Blessings.  This set is just beautiful!  It's a set of 12 with wonderful sentiments and a few flourishes.  You'll especially like this set if you're Irish!  ;)  For my card today, I used an absolute favorite sentiment of mine.  If you remember, it was my choice of sentiment in the Beautiful You set that Verve released, and I was SO excited to see it reappear in this set!  I also used the Hibiscus Plain Jane (also being released tomorrow) paired with one of the flourishes from the Blessings set. 

Hope to see you at the Beach Party Release tomorrow night, April 23 at 9pm Eastern!  For more chances to win some Verve and just to have fun, join in the Beach Party Challenges that are happening now!  Thanks for stopping by!  SUPPLIES USED:  Stamps- Blessings, Hibiscus Plain Jane (Verve Stamps); Ink- Onyx Black (Versafine), Kiwi Kiss (SU);  Paper- Tangerine Tango, Basic Black (SU); Accessories- Finial Press embossing folder (SU), ribbon (Darice), Glossy Accents;  Finished card measures 4.25"x5.5"

Tuesday, April 20, 2010

New Crafter's Workshop at Taylored Expressions

Taylored Expressions is hosting a blog hop today to showcase the new Crafter's Workshop stencils now available. You'll have the chance to see a few of the many opportunities for creativity in using these fun stencils today from the Baker's Dozen.

I used the Kasbah stencil for my two cards.  For my first card, I used the stencil itself as a stamp.  I put my stencil on a craft mat and sprayed it with Gold Metallic Maya Mist.  Once the stencil had a nice coating of mist, I picked it up from the craft mat and "stamped" it onto my black cardstock.  While the mist was still wet, I sprinkled clear embossing powder on it and heat embossed.  Using the stencil to stamp the pattern on the cardstock gives a distressed look since not every spot gets the same amount of ink.  Clear embossing adds a neat texture as well.  I embossed the sentiment "You Rock" in black.  It is from the You're My Hero stamp set. 

For my second card, I used the stencil to dry emboss with my Cuttlebug.  This is probably my favorite thing to do with these stencils.  I just LOVE the subtle impression it makes.  I stamped the sentiment from Faith and Hope onto white cardstock, die cut, embossed and sponged it.  Then I ran it through the Cuttlebug again using the Kasbah stencil.  I also embossed the pink cardstock using the stencil. 

You can see more creative ways to use these stencils by visiting these members of the Baker's Dozen:

Jami, Karen M., Sankari, Jeanie, Jackie, Alex, Karen G., Melissa, Jodi, Carolina and Taylor

Thanks for stopping by today and have a great day!

Sunday, April 18, 2010

Cutie Pie

Here's a simple little card I made when I had my Baby Button Bits set out.  I just LOVE this set.  I think the little bee from the set is probably my favorite image. . .especially when I can make it a ladybug!  :)  For this card, I embossed the Lemon Tart panel using the Polka Dot embossing folder from QuicKutz.  Then I stamped the bee in Summer Sunrise ink.  I added a blue polka dot button and a pale yellow button on top of that.  I added some Stardust Stickles to the bug and stitched a ribbon tab on the side using Rustic Cream Button Twine

Thanks for stopping by today!  Hope you're having a wonderful Sunday!  SUPPLIES USED:  Stamps- Baby Button Bits (PTI); Ink- Summer Sunrise, Smokey Shadow (PTI);  Paper- Lemon Tart (PTI); Accessories- Polka Dots embossing folder (QuicKutz), Swiss Dots ribbon, Rustic Cream Button twine (PTI), Stardust Stickles, buttons;  Finished card measures 4.25" square

Saturday, April 17, 2010

Little Lady

I have something a little different to share with you today.  I purchased a Silhouette SD about 2 months ago.  The main reason I bought it was to cut out 3D items and templates and make that process a little easier!  I have LOVED my Silhouette and haven't regretted my purchase one bit.  The other day, I came across My Creative Classroom and saw that there was an online Silhouette class.  I decided to take it and learn more about what I can do with my Silhouette.  This page is my first assignment for the class.  Let me say, I LOVE the class so far!  If you have a Silhouette and, like me, haven't really done anything but the basics. . .downloading from the online store and cut the files on your Silhouette, you will enjoy these classes.  I am taking Silhouette 102.  There is a Silhouette 101, but it seemed that I had already done things covered in that class, so I started with Silhouette 102. 


For this page, I learned how to create a title by welding the letters (so they are attached) and creating a shadow for the title (the white behind the letters).  I also learned how to ungroup the files so that you can separate pieces of the image.  For instance, on the ladybug, I could separate all of the pieces so that I can just cut the pieces that are black out of black cardstock, red out of red, white out of white instead of having to cut all the pieces of the ladybug out of each color and have all these extra pieces.  It's also great for saving your blade and your paper!  You only cut the pieces you need out of a certain color! 


The extra elements I added to this page are the large scallop border using the Large Scallop die from Papertrey Ink and also the Ric Rac die.  I used some Really Big Brads from Hot Off the Press.  The ladybug was purchased from the Silhouette online store and the font for "Little Lady" is a free font I downloaded to my computer from Creating Keepsakes, CK Ali's Handwriting

Thanks for stopping by today!  Have a wonderful day!

Friday, April 16, 2010

Ain't No Sunshine


Today's Friday and it's time for another Our Craft Lounge Design Team Sketch!  Today's sketch was based on an ADORABLE card from Kisa!  You can see her adorable card on the OCL Blog!  For my card, I used the Sunshine Cheer set.  So far, I've always used this set for sunny days and sunshine.  I thought today, in honor of the rain that we've been having, I'd create a card for the non-sunny days!  LOL 


I stamped the cloud on white cardstock twice, colored them and cut them out.  I stamped a cloud on the focal piece, colored it and then stamped the raindrops and colored them using Copics.  I added some Stardust Stickles to the heart raindrops as well.  I mounted the cut out clouds using dimensional adhesive and added some faux stitching, brads and drew a box with a black pen and ruler. 


Hope you have time to play today!  Thanks for stopping by!  SUPPLIES USED:  Stamps- Sunshine Cheer (OCL);  Ink- Tuxedo Black (Tsukineko); Accessories- brads (Making Memories), white gel pen, paper piercer, Copic markers, Stardust Stickles, circle and scallop circle punches (Marvy Uchida);  Finished card measures 5.5"x4.25"

Thursday, April 15, 2010

Precious and Few


I was playing around with the Beautiful Blooms II #1 Die Collection from Papertrey Ink.  The first thing I did was emboss the smooth side of the die (the back side) onto the Lemon Tart cardstock for the largest flower, then I stamped the largest flower from the Beautiful Blooms II set in Summer Sunrise ink in the embossed section.  Then I took the medium size die and embossed it the normal way (with the ridge facing the cardstock) just above and to the right of the largest flower.  I stamped the medium flower inside the impression in Summer Sunrise ink.  The last flower was die cut using white cardstock, stamped in Lemon Tart ink and then mounted over the embossed flowers using dimensional adhesive.  The leaf was stamped in Ripe Avocado ink and mounted under the smallest flower. 


You may be asking why I embossed differently with the two largest flowers.  It's hard to tell in the photograph, but it adds a lot of depth to the flowers.  The largest flower looks the furthest away because I used the back side of the die to emboss (or actually deboss) a large, deep flower.  The medium size flower looks closer since I used the ridge side of the die.  That flower looks a little more raised than the largest flower since the "embossed" portion is only a ridge or outline and not the entire flower.  I hope that makes sense. 

The sentiment was stamped onto Spring Moss cardstock in Tuxedo Black ink.  This sentiment is from the Blooming Button Bits set.  I embossed lines to accent the sentiment.  The final touch was drawing a box around the edge of the card using a ruler and white gel pen. 

Thanks for stopping by today!  Hope you're having a wonderful day!  SUPPLIES USED:  Stamps- Blooming Button Bits, Beautiful Blooms II (Papertrey Ink); Ink- Lemon Tart, Summer Sunrise, Ripe Avocado (PTI), Tuxedo Black (Tsukineko);  Paper- Lemon Tart, Spring Moss (PTI); Accessories- glitter, white gel pen, Scor-Pal;  Finished card measures 4.25"x5.5"

Wednesday, April 14, 2010

All the Goodness of Life


This week is sure flying by!  I can't believe it's Wednesday already!  Today's card uses Fall To Layout 85 from the Clean and Simple Stamping blog.  I used a scrap of patterned paper from my scrap bin. . .and it was near the bottom!  LOL  I used one of the newest releases from Taylored Expressions, Let's Do Coffee.  I used some Kraft cardstock for the card base and stamped the different coffee mugs from the set in the right corner in Sahara Sand VersaMagic.  The sentiment was stamped in Dark Brown chalk ink. 

I don't know about you, but I'm really feeling this sentiment this morning!  :)  Thanks for stopping by and have a great day!  SUPPLIES USED:  Stamps- Let's Do Coffee (Taylored Expressions); Ink- Sahara Sand (VersaMagic), Dark Brown (Fluid Chalk Ink); Paper- SU, Kraft (PTI); Accessories- Old Olive grosgrain (SU), Dew Drops (The Robin's Nest);  Finished card measures 3.5"x6.5"

Tuesday, April 13, 2010

You're So Fabulous

Today I have a card to share with you using last Friday's Viva la Verve Sketch and inspiration.  I used the Serenity and Bountiful Backgrounds set from Verve.  FYI, Bountiful Backgrounds is the featured set this month, so it's 40% off! 
If you haven't participated in the Viva la Verve Challenges, they are a lot of fun and you could win some Verve goodness!
Don't forget, next week is Verve's next release!  Sneak peeks start on Tuesday on the Verve Blog, so don't miss it! 

Monday, April 12, 2010

Let's Toast!


I have a card for you today using the latest sketch from the Our Craft Lounge Design Team Sketch Challenge!  I flipped the sketch on its side to fit the image I was using.  The stamps are from the Hot Betty set from Our Craft Lounge.  I colored the image using Copic markers and added a couple of buttons.  I thought this would be a fun card to send to a girlfriend.  Thanks for stopping by today!  Hope your week is off to a great start!  SUPPLIES USED:  Stamps- Hot Betty (OCL); Ink- Tuxedo Black (Tsukineko); Paper-Whirlybird Collection (My Mind's Eye), Prism Papers; Accessories- buttons (PTI), white gel pen, Copic markers, ticket corner punch (SU);  Finished card measures 5.5"x4.25"

Saturday, April 10, 2010

Papertrey Ink Click Simple Sneak Peek

I have another sneak peek for you today of another of the Click Simple Templates that will be available for purchase April 15th!  This template is the Artisan Window Box and it's a perfect little box for a dainty little gift. . .like tea!  It can make something as simple as tea look like it came right from the gourmet shop! 

You can see the full project in the download that accompanies the template, which is available for sale on April 15th!

For now, though, you can see more peeks of this template by visiting other members of the Click Simple Team:

Melissa Phillips
Laurie Schmidlin
Kelly Lunceford

Thanks for stopping by and have a wonderful day!

Friday, April 9, 2010

Papertrey Ink Click Simple Sneak Peek

Ready for a peek of one of the newest Click Simple templates?  This set of templates, designed by Kim Hughes, is ADORABLE! They are so perfect for little boys as well as big boys! The first thing I thought to create with this truck template was boy birthday party invitations, but then I started thinking outside the box a bit. Since this truck reminded me of older days, and my grandparents, I thought it would be neat to create a 50th Wedding Anniversary card and really bring back some memories for them. . .you know, to times BEFORE limousines were the customary form of transportation for wedding parties! :) 

You can see the full project in the download that accompanies the templates, which is available for sale on April 15th! 

You can also visit these members of the Click Simple team to see more sneak peeks with these templates:

Thanks for stopping by and have a great day!

You Make Me Smile

A little while ago, Beate posted a tutorial on making the Tim Holtz Grunge Flowers.  If you've seen the flowers that Beate has made. . .WOW!  They are gorgeous!  I didn't have the Tim Holtz Alterations die that she used, but I DID have the Beautiful Blooms II #1 Die Collection from Papertrey Ink.  This flower is pretty similar, except not distressed-looking.  Instead of making a flower with just paper and distressing that paper, I thought I'd see how one of the these flowers would look if I used the coordinating stamp set for this die, Beautiful Blooms II.  I LOVE the way it turned out!  I added some glitter to the flower to make it sparkle.  The sentiment is from the Signature Greetings set.  I used Hawaiian Shores ink for the flower and some Polka Dot Parade patterned paper, Lemon Tart and Hawaiian Shores cardstock
Thanks for stopping by today!  Hope you have a wonderful weekend!  SUPPLIES USED:  Stamps- Signature Greetings, Beautiful Blooms II (PTI); Ink- Hawaiian Shores (PTI), Onyx Black (Versafine); Paper- Hawaiian Shores, Lemon Tart, Polka Dot Parade (PTI); Accessories- glitter, Spring Moss Twill (PTI), paper piercer, corner rounder;  Finished card measures 5.5"x4.25"

Thursday, April 8, 2010

Taylored Expressions RELEASE DAY!


Today's the day!  You can now purchase all of the new sets from Taylored Expressions!  The last set I have to show you is Let's Do Coffee.  It's an adorable new set from the Apple Doodle Ink line.  For my project, I used a glassine bag and filled it with some yummy flavored coffee beans.  I just added some ribbon around the bag and created a "tag" using Plain Circle and Scallop Circle Nestabilities.  I stamped the image onto Choice Snow White cardstock and again on Kraft cardstock.  I colored the image on the Kraft cardstock using Copic markers and Smooch in Gold Lame and Pumpkin
Before cutting out and attaching the Kraft image to the white image, I cut out the "Wake Up" label from the white image using a craft knife and attached it to the Kraft image.  Then I cut out the Kraft image and adhered it over top of the white image. 

To recap the new products that are now available:
Alterable - Tea tin

Be sure to stop and see what the rest of the Baker's Dozen has to show you today!  I hope you've enjoyed the sneak peeks and wish you happy shopping!

Wednesday, April 7, 2010

Knock Your Socks Off!


It's no secret that I LOVE sketches!  I love sketches so much that I was THRILLED when I learned Papercrafts had come out with a special issue that is all sketches!  You've probably seen Go To Sketches advertised.  Well, I bought it right away and I LOVE it!  In fact, Cath over at Moxie Fab World has been posting some challenges using some of the sketches, so I HAD to play along!  I used a sentiment from Verve, from the All About You set.  I've never used a speech bubble on a card before.  I thought it would be cute to pair up this "sock hop" outfit with the sentiment "Hope today knocks your socks off!"  If you love sketches, play along and post your creation in the Mr. Linky section!  Thanks for stopping by today!  SUPPLIES USED:  Stamps- All About You (Verve Stamps); Ink- Tuxedo Black (Tsukineko); Paper- Bitty Dot Basics, Pure Poppy, True Black (PTI);  Accessories- Dew Drop (The Robin's Nest), white gel pen;  Finished card measures 5.5" square

Taylored Expressions Sneak Peek - Day 2


Are you ready for some more sneak peeks?  The project I have to share with you today uses the Make the Grade and Extra Credit sets from Taylored Expressions, to be released tomorrow, Thursday, April 8th at 8am PST.  It also uses the Apple Jack Card Kit.  If you haven't purchased one of the card kits before from Taylored Expressions, you can view the video on Taylor's blog to see what value is packed in there!  This is what you'll receive in the card kit:

10 Choice Cardstock A2 card bases
10 A2 envelopes
15 sheets of patterned paper sized for cardmaking at 4" x 6" (3 sheets each of 5 double-sided patterns)
20 sheets of 4 1/4" x 5 1/2" cardstock (4 sheets each of 5 colors)
1 package of Kaisercraft Pearls
8 panels of Choice Cardstock sized 4 1/4" x 5 1/2" (for images and layering)
5 yards of ribbon (2.5 yards each of 2 different styles)
1 Perfect Package Card Box

Everything you need to create a gift package is included!  (except adhesive and a paper trimmer, of course) Each of my cards only uses supplies that came in the card kit. 

With Teacher Appreciation Week coming up, I thought I would create a gift for Savannah's kindergarten teacher.  Savannah ADORES Miss Mackey and she loves to give her homemade gifts, so I know she'll love giving her this gift box filled with cards. 


I made one extra card to go in the set.  This card uses one of the a la carte Cuppie images, Chalkboard Cuppie. It does not use supplies from the card kit, so that's why I say it's "extra".  I used the cursive alphabet image from Extra Credit to create the little piece of patterned paper.  The image was colored using Copic markers. 


So, how do you like the Apple Jack Card Kit?  Hopefully I've inspired you to create a gift set for the teachers in your life!  Don't forget to stop and see what the rest of the Baker's Dozen has created using these sets!  I can't wait to see!

LinkWithin

Related Posts with Thumbnails