Saturday, December 31, 2011

Wishing You All the Best

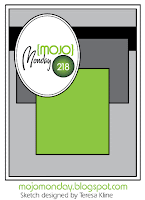
I can't believe it's New Year's Eve!  2011 is coming to an end and I can't believe it went by so fast.  I was able play along with the latest Mojo Monday Sketch.  I used the Kind Words set from Verve.  I thought this sentiment was appropriate for the coming New Year! 

I stamped both the sentiment and the flower image in Frost White craft ink, but I brushed gold Perfect Pearls over the flowers and some green chalk on the stems to give them some color on the dark cardstock.  Just a reminder that the Verve Good Buy SALE ends tonight, so if you're looking for a deal, head on over!

Wishing you all the best in the New Year!   Have a wonderful and SAFE New Year celebration!!


Friday, December 30, 2011

More Packaged Gifts

It has been REALLY busy around here, so I haven't been able to post anything new.  I did have these projects that I created for teacher gifts and class treats.

Remember that Homemade Peppermint Bark we made?  Well, I packaged more of it up in these ADORABLE little Santa Boxes!  The Santa Box was created using the Cover-All Template from My Time Made Easy.  I packaged up the Peppermint Bark in cello bags and tied it with a ribbon.  Then, I put some filler in the box and then the cello bag.  I used the Wonderful Words:  Holiday Die Collection from Papertrey Ink for the "Merry".  These packages were a big hit. . .and really not that hard to put together!

The second project I have to show you are just little treats bags I created for my daughters' classes.  It was just a piece of cardstock folded over the little bag of Holiday Skittles, stapled and a snowflake embellishment added.  I punch circles using a 2 1/2" circle punch and then die cut them using the Let It Snowflake Dienamic from My Favorite Things.  I used the "negative" cut from the die and added glue to the center with some glitter.  The sentiment is from the Sending You a Little Christmas Pure Innocence stamp set. 


Thanks for stopping by today and if you don't hear from me over the weekend. . .have a safe and Happy New Year! 


Monday, December 26, 2011

Happy Days

There hasn't been very much stamping going on in the last few days, but we've really enjoyed our Christmas!!  I hope you enjoyed your Christmas too!  Now that things have calmed down a bit, I need to start making some Christmas thank yous.  I'm hoping to get started on those in the next day or so, but for now I was able to stamp a cute card for everyday. 

I used the Sky's the Limit plus coordinating dies set from Taylored Expressions.  I stamped the balloon twice.  Once on white cardstock and I die cut that balloon.  The second was stamped on patterned paper and trimmed to paper piece.  I added some shading on the balloon with Copic markers.  The clouds were created using different cloud dies.  The smallest clouds are the ones that come with the coordinating dies, across the top was created using the Cloud Border Die, and the two larger clouds at the bottom were created with the Cloud Duo Die.  All of the clouds were covered with Stardust Stickles to add some sparkle.  The sentiment panel was created with one of my new favorite dies to use as a sentiment panel (even though it wasn't meant for that), Fly Your Flag 2 plus coordinating die

The papers are from my December Key Ingredients Kit, which includes papers from the Christmas Wishes Collection from Bella Blvd. 

Thanks for stopping by!  I hope you're enjoying your day!!


Sunday, December 25, 2011

Merry Christmas!!


Wishing you all a VERY Merry Christmas!!


Friday, December 23, 2011

Gift Packaging


One of my favorite things to do for those little, last minute gifts at this time of year is package up cards that I've made throughout the year.  I do use cards I've made to send through the mail, but unfortunately I don't send out as many cards as I make.  Although, I guess the people who receive a set of cards might not think that's so unfortunate!  LOL  (at least I hope so)  A great way for me to use up my "stash" is to package them up as gifts for teachers, friends or even family members that I don't buy for, but want them to know I'm thinking of them. 

There are many different ways to package up a card set, but one of my favorites is with a clear acrylic box.  When I don't have time to stamp or embellish a cardstock box of some sort, I find that these acrylic boxes are PERFECT!  The card on the inside provides the "decorating".  Adding a ribbon and tag makes it complete.  For this package, I used the Holiday Button Bits set from Papertrey Ink to create my tag and along with the Mat Stack 3 Die.  Being able to add buttons really helps to embellish the package even more.  Thanks for stopping by today and have a great day! 


Wednesday, December 21, 2011

Sweet Delight

This week, I decided to do something a little different for teacher gifts.  Every year, I usually send in a card set or some similar homemade crafty item for teacher gifts.  This year, after my one sister gave me the simplest recipe EVER, I decide to make some homemade Peppermint Bark and package that up! 

I started with what to package it in.  I used the Clear Top Hinged Tin that you can find at Taylored Expressions.  It holds a nice amount of the bark, and enables you to "see" it through the lid, so I thought it would work perfectly.  I packaged the bark in a cello bag and sealed it, then placed it in the tin. 

I used the Season's Sweetings set along with papers from the Holly Jolly Collection from Echo Park.  The image was colored with Copic markers.  I used the Medium Scallop Border Die and a strip of patterned paper to create the belly band.  The focal piece was created using the Totally Tags Dies, and the sentiment panel was created using the Fly Your Flag 2 Die.  I scored the ends of the "banner" to give it some dimension and the look of it flowing. 

This project was really very simple and the kids LOVED helping to make it!  Now I've got some packaged gifts to give away!  For those of you wondering about this SIMPLE recipe, here it is:


Homemade Peppermint Bark
3 - 4oz. bars bittersweet or milk chocolate bars
3 - 4oz. white chocolate bars
Toppings of choice

Line a 17x12 inch cookie sheet with parchment paper.  Break each bar into squares or rectangles.  Arrange in a checkerboard pattern on pan.  Pieces will touch.

Bake at 225 degrees for 5 minutes or just until chocolate is melted.  Remove pan to a wire rack.  Swirl chocolate into a marble pattern using a toothpick.  Sprinkle with crushed pretzels and candy canes.

Chill 1 hour or until firm.  Break into pieces.
Hope you've enjoyed today's project and I hope you enjoy the bark even more!  :)


Sunday, December 18, 2011

Winter's Wonders


I have a card today that uses some different colors for a Christmas card.  I used the Snowflake Splendor set from Verve and created a background paper using different stamps in the set.  The sketch is this month's Dirty Dozen Sketch Challenge, and the colors I used are from the Inspiration Challenge this month. 

I haven't been around too much this last month due to regular holiday to-dos, but also because of THIS EXCITING NEWS!!!  I am beyond thrilled to join the Splitcoast Dirty Dozen!!  My "roomie" is my sweet friend and fellow DT member, Jen Shults!  If you get a chance, stop over to say hello and congratulate her!  If you're a Fan Club Member, you can view the newest gallery HERE.  If you're not a member, you can sign up. . .and I know you won't be disappointed!  The Dirty Dozen Gallery has always been an amazing source of inspiration for me.  I big, huge THANK YOU to those of you who have stopped by to say hello and say congrats. . .I really, really appreciate it!  You've made this even more special for me!

Thanks for stopping by today and I hope you're having a wonderful Sunday!  SUPPLIES USED:  Stamps- Snowflake Splendor (Verve Stamps); Ink- Rhubarb Stalk, Bamboo Leaves, Cantaloupe, New Sprout (Memento); Paper- Pure Poppy, Summer Sunrise, True Black (PTI);  Accessories- Curvy Bookplate Die (Verve Stamps), Stardust Stickles;  Finished card measures 5.5"x4.25"


Wednesday, December 14, 2011

Just Because Mojo


I've been making so many Christmas cards lately that I decided to create something not so wintery!  :)  I started with the latest Mojo Monday Sketch Challenge and used the Fluttering By set from Verve.  (by the way, Fluttering By is the Stamp of the Month at Verve and is 40% off through December 31st while supplies last!)  I used papers from the Country Drive Collection from Echo Park. 

I paper pieced the butterfly's wings and added some bling.  I die cut the focal circle and scallop circle using Plain and Scallop Circle Nestabilities.  Come play along with this week's Mojo Monday Challenge!  Thanks for stopping by and have a great day!  SUPPLIES USED:  Stamps- Fluttering By (Verve Stamps); Ink- Early Espresso (SU); Paper- Country Drive Collection (Echo Park), Bazzill;  Accessories- bling (Want2Scrap), Plain and Scallop Circle Nestabilities (Spellbinders);  Finished card measures 5.5"x4.25"


Sunday, December 11, 2011

You're Dino-mite


This weekend I needed a birthday card for one of my daughter's classmates.  I don't always have boy cards on hand, so I created this one using the Kid at Heart set from Taylored Expressions.  I used an older Taylored Expressions Sketch Challenge sketch for the layout. 

I stamped the dinosaur and then added Viva Red Pearl Pen to the hearts and Black Pearl Pen for the eyes.  The pearls pens give a fun bit of dimension. . .especially on a kids card!  The papers are from the Finally Fall Collection from Bella Blvd

Hopefully my daughter's friend will like the card!  Thanks for stopping by today and have a wonderful Sunday!  SUPPLIES USED:  Stamps- Kid at Heart (Taylored Expressions); Ink- Tuxedo Black (Tsukineko), Ripe Avocado (PTI); Paper- Finally Fall Collection (Bella Blvd.), Kraft; Accessories- Red and Black Pearl Pens (Viva), ribbon, border punch (Martha Stewart);  Finished card measures 4.25"x5.5"


Thursday, December 8, 2011

Mojo Winter Wishes


Time is flying.  Sometimes, that's a good thing, but in this case I feel like I can't keep up!  The kids have been sick recently, so that tends to change my "routine".  I just feel like Christmas is going to be here and I'm not going to be ready!  Aaaaahhhhh!  :)  Here is a card I created for the latest Mojo Monday Challenge.  This week's challenge is a contest, so you can win prizes for being a top pick!  :)

I used the Winter Mittens set along with the frame from Tag Time.  I die cut the focal piece using the Curvy Bookplate Die and then stamped the sentiment and the mitten image.  I stamped the mitten image again onto patterned paper and cut the mittens out and mounted them on top of the sentiment panel with foam tape.  I added some twine and bling for some extra details.  The papers are from the Season's Greetings Collection from Echo Park. 

Thanks for stopping by today!  Hope you're having a great day!  SUPPLIES USED:  Stamps- Winter Mittens, Tag Time (Verve Stamps); Ink- Tuxedo Black (Tsukineko), Scarlet Jewel, Smokey Shadow (PTI); Paper- Season's Greetings Collection (Echo Park); Accessories- Curvy Bookplate Die (Verve Stamps), bling (Doodlebug);  Finished card measures 5.5"x4.25"


Sunday, December 4, 2011

Mojo Life Is Perfect


I have a card today that uses the latest Mojo Monday Sketch.  I decided to use the square version of the sketch for my card.  The sentiment is from the Words of Wisdom set and the leafy sprigs are from the Sunny Days set.  I die cut the leaves with the Leafy Sprig Die Set

The papers are from the Campfire Collection by October Afternoon.  I used some Buttercup Liquid Pearls to add the pearls to the sentiment panel.  The finishing touch was the stitching around the card.

I just love this sentiment because it is SO true!  I don't know about you, but a lot of times I let myself get caught up in all of the "imperfections" in life.  I just need to sit back and realize that even with all of those imperfect things, I do have a wonderful life with many, many blessings to be thankful for. 

Thanks for stopping by today and have a wonderful Sunday!  SUPPLIES USED:  Stamps- Words of Wisdom, Sunny Days (Verve Stamps); Ink- Enchanted Evening (PTI); Paper- Campfire Collection (October Afternoon), Bazzill; Accessories- Buttercup Liquid Pearls, Leafy Sprig Die Set (Verve Stamps);  Finished card measures 4.25" square


Thursday, December 1, 2011

Taylored Expressions RELEASE DAY!!


TE Release Day!
  • All of the new products are now available for purchase! Check out the Fresh Out of the Oven Department to see everything in one place!
  • More projects from the Baker's Dozen to inspire you. Just follow the link list below.
  • PETITE-A-PALOOZA SPECIAL: Purchase any 6 Petite Stamp Sets (new or old) through Friday December 9th and receive a Petite Storage Case absolutely FREE!

Today I'm featuring the Your Ways set again with the Times & Seasons Card Kit, plus another set that I haven't yet featured!  I think my card today looks completely different from my card yesterday, but it uses the same card kit!  I stamped the flower image onto a transparency sheet with Jet Black Staz On and added some adhesive pearls to the sentiment for a pop of color.  I coudn't find a spot on the card for the flowers that didn't look crowded or "in the way", so I tried using the transparency and it worked!  It adds that little extra detail without crowding the design. 

I don't know about you, but I LOVE card kits!  I love having all of the coordinating supplies in one package ready to create!  There are four new card kits available and they make GREAT GIFTS!!

My second project today uses the Fly Your Flag 3 set and coordinating die.  Fly Your Flag 3 is a set of 7, plus a coordinating die that was designed by Taylor for the *te* line.  All three sets are a unique take on pennants.  You can fold them together and string along a piece of baker’s twine or on a toothpick or decorative pin, cut in half and create a banner. . .anything you can think up! 

When I first looked at this set, all I saw was a mustache. . .so I went with it!  I created a card that I think makes a perfect boy card.  I used the Take Note Die 1 along with some circle punches to create the face.  Then I die cut the "mustache" out of black cardstock using the die from the set.  I also used the Times & Seasons Card Kit for this card as well. . .and it even had a mustache paper in it!  :)  I also used the die as it was intended and created the "Hello Friend" banner.

I hope you've been inspired these last few days!  Please stop by and check out what the rest of the Baker's Dozen has created for today! 


  • Danielle Lounds
  • Jami Sibley
  • Jen Shults
  • Jodi Collins
  • Karen Giron
  • Lori Craig
  • Melissa Sauls
  • Melody Rupple
  • Nancy McKinney
  • Regina Mangum
  • Sankari Wegman
  • Taylor VanBruggen
  • Tori Wild
  • Wanda Guess


  • Thanks for visiting and HAPPY SHOPPING!!


    LinkWithin

    Related Posts with Thumbnails