
 Supplies Needed:
-paper trimmer with scoring blade
-sticky strip
-5.25"x 7 5/8" sheet of cardstock
-3"x5" notepad
-scissors
-Bic Round Stick pen
-4.25"x1.25" piece of paper to wrap pen
-stamps of choice
Step 1
Take your 5.25"x7 5/8" sheet of cardstock and score the long side at 3.25", 3 5/8" and 4". (second picture shows what score lines should look like)


Step 2
Fold cardstock in half (on the 3 5/8" score line). 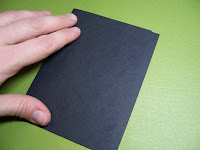
Step 3
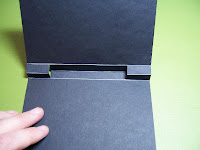
Cut small slits about an inch from each end. (lines marked in white in picture)


Step 4
Open up holder, reverse the fold of the two ends (that you made with the slits) so that they fold toward the inside of the holder, and place sticky strip on the right side of them as shown in picture. 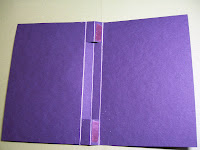


Step 5
Peel off backing of sticky strip and fold over the front cover so that the two ends (that fold in toward the inside of the folder) adhere to the back cover of the holder. (the third picture in this group shows what the front of the holder will look like when closed) Decorate the front of holder how you choose.


Step 6
Take your 4.25"x1.25" piece of paper and stamp if you choose. (or just use patterned paper)
 Step 7
Turn stamped piece of paper over and apply sticky strip.

Step 8
Remove backing and attach to pen.

Step 9
Attach sticky strip to the back of the 3"x5" notepad , peel off backing and adhere notepad inside holder.

Step 10
Insert pen in holder and there you have it. . .your very own notepad holder complete with pen!

4 comments:
Great tutorial! Thanks very much for sharing!
~Angie
Great tutorial - I'll have to try this when life calms down! :)
Great tutorial, I printed it to case for future use.
Awesome instructions Charmaine! You are one heck of a tutorial writer!
Post a Comment